Overview
Gold is commonly found in quartz veins throughout the United States and worldwide. These veins, often several inches to a few feet thick, run horizontally deep underground. If the gold is visibly abundant, it’s usually more valuable left in its natural setting for collectors. For finer or less visible gold, a careful extraction process is required, but it involves hazardous chemicals that demand strict safety precautions.
Step 1: Prioritize Safety
- Equip yourself with safety goggles and a respirator to protect against dust and harmful fumes.
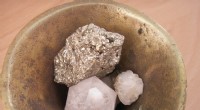
- Using a sledge hammer, crush the quartz into pea‑sized pieces.
Step 2: Grind to a Fine Consistency
- Transfer the small fragments to a mortar and pestle.
- Grind until the material resembles fine sand; this may take several minutes.
Step 3: Gravity Separation
- Place the sand in a gold pan and add water.
- Swirl the pan clockwise, allowing excess material to overflow.
- Gold, due to its high specific gravity, will settle behind the pan’s riffles.
Step 4: Cyanide Leaching
- Wear long rubber gloves before proceeding.
- Add a very dilute cyanide‑lime solution (available from specialty gold‑recovery suppliers such as Shor International).
- The solution dissolves the gold, separating it from other minerals.
Step 5: Recover Solid Gold with Zinc
To precipitate the gold from the cyanide solution, introduce a small amount of zinc dust. The zinc reacts with the gold‑cyanide complex, leaving pure gold in solid form.
Materials Needed
- Safety goggles
- Respirator
- Quartz containing gold
- Sledge hammer
- Mortar and pestle
- Gold pan
- Water
- Long rubber dish gloves
- Dilute cyanide‑lime solution
- Zinc powder
TL;DR
To return gold to its solid state, simply add zinc dust after cyanide leaching.