By Kabrina McLaughlin – Updated Aug 30 2022
Whether you’re conducting a school science experiment or simply curious, crushing rocks at home can be a rewarding hands‑on activity. With basic household items, you can safely break rocks into smaller pieces for observation or analysis.
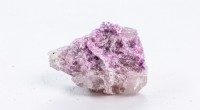
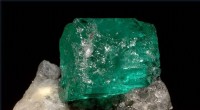
Start by sorting your rock collection. Discard any specimens that are too large for your hammer or too small to break efficiently. Choose pieces that match the size of the hammer head you plan to use.
Wash the rocks with water and a hard‑bristled brush. Remove dirt, glass shards, and loose fragments to prevent contamination and protect your workspace.
Choose a hard, flat area that can withstand repeated blows—such as a concrete slab or a steel plate. Clear the surface of any objects that could be damaged.
Lay a thick cloth or padded mat over the surface. This will absorb shock, reduce noise, and safeguard your surroundings.
Place the cleaned rocks on the cloth and wrap the excess fabric around them. Gather the cloth into a makeshift sack and fasten it with an elastic band. This containment keeps fragments from scattering when you strike.
Turn the cloth bag so the elastic band lies on the bottom, exposing a flat surface for striking.
Put on work gloves and safety goggles before you begin. Proper protection prevents injury from any shards that may escape the bag.
Strike the cloth with the hammer. A clear cracking sound indicates the rocks are breaking. Use steady, even blows rather than wild swings.
After every few strikes, open the bag to inspect the rocks. Stop when they reach your desired size to avoid over‑crushing.
Once finished, sweep the fragments with the brush into a container for storage or further study.