By Jason Thompson, updated March 24, 2022
Solar power is an attractive alternative energy source because it’s free, ubiquitous, and pollution‑free. One of the biggest barriers to wider adoption is the upfront cost of commercial panels. By assembling a panel from individual, low‑cost cells, you can dramatically reduce that expense while still generating 110 volts of clean electricity. Below is a detailed, expert‑approved procedure that covers materials, construction, and safety.
Cut a square section of plywood. The panel should be sized to fit five cells across and eight cells tall, plus additional clearance: add twice the width of the wooden strips plus five inches for the width, and twice the width of the strips plus eight inches for the height.
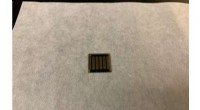
Using electrically conductive glue, affix the glass side up of each cell to the plywood. Arrange five cells side‑by‑side in a row, spacing them roughly one inch apart. Leave a generous border on all sides. Do not let the glue from one cell touch another. Leave a short line of conductive glue extending from the top of each cell—this will serve as the positive terminal. Repeat for eight rows; the final row will contain only two cells.
Strip about two inches of insulation from one end of each five‑inch wire and roughly half an inch from the other end. Apply the exposed segments to the tops of the cells with conductive glue, aligning them with the positive lines. Keep the glue coating minimal to avoid covering the cell surface.
Strip half an inch of insulation from both ends of each six‑inch wire. Glue one end to the positive line of the first cell. Twist and tape the other end to the negative terminal of the next cell. Continue this chain until every cell is electrically linked. After the final connection, you will have an unconnected negative terminal on the first cell and an unconnected positive terminal on the last.
Strip one inch of insulation from each end of the two foot‑long wires. Glue one to the positive terminal of the last cell, and twist and tape the other to the negative terminal of the first cell. Secure the wooden strips around the plywood border with regular glue, allowing the two foot‑long wires to protrude between the strips—these serve as the panel’s terminal leads.
Cut a Plexiglas sheet to match the plywood size using a saw, then affix it to the wooden strips. The Plexiglas protects the panel from weather and impact. Seal all seams with silicone caulk to ensure a weather‑tight enclosure.
Solar cells are extremely fragile; avoid applying any pressure to them during construction or handling.