By Brian Richards – Updated Aug 30, 2022
Infrared cameras capture light beyond the visible spectrum, revealing details invisible to the naked eye. By removing the standard infrared filter that most digital cameras use to block IR wavelengths, and attaching the sensor to a telescope, you can photograph distant celestial objects with unprecedented clarity.
Disassemble your camera to access the digital sensor. Point‑and‑shoot models often rely on adhesive for the body, whereas DSLRs use screws. Consult the user manual’s “Cleaning Your Digital Sensor” section for precise instructions.
Identify the infrared filter—a small, square glass or plastic plate positioned directly over the sensor.
Carefully remove the filter. Many are secured with a weak adhesive and can be pried off with a fingernail; others may require a small screwdriver.
Reassemble the camera, ensuring all internal components are properly seated.
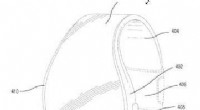
Attach a manufacturer‑specified T‑ring to the camera body’s lens mount. This ring replaces the lens and provides a clean interface for telescope attachment.
Screw the T‑adapter onto your telescope’s eyepiece.
Mount the camera (now equipped with the T‑ring) onto the T‑adapter as you would a long‑telephoto lens. Verify a snug, vibration‑free connection.
Infrared telescope photography requires long exposures; noise can become noticeable after 30 seconds. Mitigate this by capturing multiple 30‑second shots and stacking them in software such as Adobe Photoshop, Corel PaintShop Pro, or GIMP.
Removing the infrared filter permanently disables the camera’s ability to capture standard visible‑light images. Only proceed if you intend to dedicate the device exclusively to infrared photography.