By David Robinson | Updated March 24, 2022
Creating a visual representation of a sulfur atom can be a rewarding educational exercise. While a full three‑dimensional model is challenging, a two‑dimensional cross‑section is straightforward to construct and illustrates key atomic concepts—nucleus composition, electron shells, and atomic number.
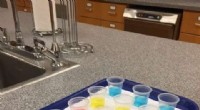
First, protect your hands with surgical gloves. In a shallow bowl, combine 16 red candy pieces (protons) and 16 black candy pieces (neutrons). Add a small amount of quick‑setting glue and use your hands to press the mixture into a compact ball that will represent the nucleus. Gently roll the ball between your palms until the glue sets, then allow it to dry for roughly 30 seconds.
Mark a central dot on a large sheet of white cardboard. Place the nucleus on this dot and trace a circle that extends just beyond the outer edge of the ball. Remove the nucleus; using a compass, draw a slightly larger circle around the dot, then repeat two more times to create three concentric rings. Each ring represents an electron shell (K, L, and M).
Paint the innermost circle yellow to denote the first energy level. For the remaining rings, use distinct shades of blue—lighter for the second shell and darker for the third. Allow each layer to dry before proceeding.
Return the nucleus to the center. Attach two black candy pieces to the first ring (K shell), eight to the second ring (L shell), and six to the third ring (M shell). These represent sulfur’s 16 valence electrons, distributed as 2 + 8 + 6.
On a separate strip of cardboard, glue the remaining candy pieces in a line and label them “Proton,” “Neutron,” and “Electron” to reinforce the model’s constituents.
For a safer alternative to quick‑setting glue, coat the candy in PVA glue, press them into a lightly oiled, round container, allow to dry, then remove the solid core.
Quick‑setting glue dries rapidly and can cause skin irritation or accidental bonding to surfaces. Avoid contact with bare skin, and keep all adhesives out of reach of children. Do not consume the candy after the model is finished; some glues are toxic.