By Rosann Kozlowski – Updated March 24, 2022
pH quantifies the hydrogen‑ion activity in aqueous solutions. It is defined as pH = –log10aH⁺, where aH⁺ is the hydrogen‑ion activity (often treated as concentration). Because the scale is logarithmic, each unit change represents a ten‑fold difference in hydrogen‑ion concentration.
Acidic solutions have a pH below 7 (e.g., battery acid ≈0, tomato ≈4). Basic solutions exceed 7 (e.g., baking soda ≈9, drain cleaner ≈14). A neutral solution sits at pH 7. To determine a sample’s pH accurately, a calibrated pH meter is essential.
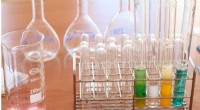
All necessary items—pH meters, distilled water, lint‑free wipes (such as Kimwipes), and calibrated buffer solutions—are available at specialty chemical suppliers, plant nurseries, and aquarium retailers. Reusing buffer solutions can degrade probe performance, so always use fresh buffer in a vessel that snugly accommodates the probe.
A typical pH meter uses two electrodes. The glass electrode senses the voltage generated by hydrogen‑ion interactions; the reference electrode remains electrically neutral. The voltage difference is translated into a pH reading displayed on the meter.
Calibration aligns the meter’s output with known standards—buffers of defined pH values. Because repeated use can drift the probe’s accuracy, daily calibration is recommended for reliable results.
Follow these four steps to achieve precise calibration:
Before calibration, wear gloves and safety glasses. Power on the meter, remove the probe from its storage solution, rinse with distilled water, and wipe dry with a lint‑free tissue.
Submerge the cleaned probe in a pH 7 buffer solution. Press the Calibrate button and wait for the pH icon to cease flashing. If the display reads 7, accept the value; otherwise, adjust via the keypad. Rinse the probe again with distilled water and wipe clean.
Repeat the process using a pH 10 buffer. Press Calibrate once the icon stops flashing. Verify a reading of 10; if it differs, correct it on the keypad. Rinse and wipe the probe afterward.
Your meter is now calibrated. For each new sample, submerge the probe, rinse with distilled water between measurements, and record the pH. Regular calibration ensures trustworthy data for all analyses.