By Jeva Anand | Updated Mar 24, 2022
LightFieldStudios/iStock/GettyImages
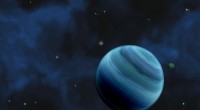
Creating a solar system model at home gives students a tactile way to understand planetary distances and size relationships. While a perfectly scaled model is impractical—Guy Ottewell of the National Optical Astronomy Observatory notes that an 8‑inch Sun would leave Earth the size of a peppercorn, Pluto the size of a pinhead, and the entire model would stretch 1.58 miles—this hands‑on activity offers a valuable learning experience.
Lay the cardboard box on its side so the opening faces you. Paint the interior a deep black or navy blue. Add stars or galaxies with white or glow‑in‑the‑dark paint for a night‑sky effect.
Sort the plastic foam balls into four size groups. The largest ball will represent the Sun. The next tier includes Jupiter and Saturn, followed by Uranus and Neptune, and finally the inner planets—Mercury, Venus, Earth, Mars—and Pluto.
Cut four large rings from poster board for Jupiter, Saturn, Uranus, and Neptune. Cut a fifth ring that fits between the orbits of Mars and Jupiter to represent the asteroid belt.
Glue the rings to their respective planets. Affix the Sun and planets to the tips of the straws. While the glue dries, use felt markers to sketch asteroids onto the asteroid‑belt ring.
Measure the width of the box opening and cut two pieces of fishing line to that length. Punch holes in the top of the display and thread each line through opposite holes, ensuring all ends sit at the same height. Secure each line with a knot at the ceiling so the straws stay in place.
Glue the straws to the bottom of the display. Position the Sun at the center, then arrange the planets in order from Mercury outward to Pluto. Tie the fishing lines to the asteroid‑belt ring at appropriate points.
Leave ample space between Mars and Jupiter for the asteroid belt. Pluto can be omitted if desired, reflecting its dwarf‑planet status.
Wear an apron or old clothing when working with tempera paints, as they can be difficult to wash out.