By J.S. Copper
Updated Aug 30, 2022
Creating a three‑dimensional representation of our solar system is a classic hands‑on activity for K‑12 science classes. With just a few household supplies and a trip to a craft store, you can build an engaging and educational model that illustrates planetary sizes, distances, and colors.
Assign each foam ball to its planetary counterpart using the following size guide:
Attach a pair of plastic rings to the Saturn ball to represent its iconic rings.
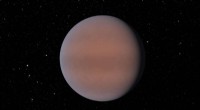
Using a toothpick as a stand and a small brush for application, coat each ball with its authentic color palette:
When using multiple colors, apply the base color first, let it dry, then add secondary details to avoid bleeding.
Cut wooden skewers to the following lengths, reflecting the relative distance from the Sun (in centimeters for an approximate scale):
Glue one end of each skewer to the corresponding planet. Use toothpicks to secure Saturn’s rings around its sphere.
Secure the opposite end of each skewer into the central hole of the Sun ball, arranging them from closest to farthest. Allow the glue to set fully before handling.
For a streamlined process, paint each planet’s base color first, let it dry, then add details. After assembly, you can hang the model by inserting a hook into the Sun’s top or attach a wooden skewer through its bottom to a sturdy base. Remember, Pluto is no longer classified as a planet, so you may choose to omit it.
Supervision by a parent or teacher is recommended when children use sharp tools or glue.